 |
|
|
1. Introduction and Updates
2. FAQ
3. Walkthrough
a. The Beginning
b. Daila to Kandorean Temple
c. Shrine of the Sea God and Dehkan Plateau
d. Indra Cavern to Garoh
e. Air's Rock
f. Garoh revisited to Alhafra and Osenia Caverns
g. Gondowan Cliffs to Kibombo
h. Gabomba Statue to Madra Catacombs
i. Lemurian Ship to Shrine of the Sea God
j. Yallam to Apojii Islands
k. Aqua Rock
l. Tundaria Tower to Izumo
m. Gaia Rock to Alhafra Revisited
n. Champa to Champa Revisited
o. Sea of Time to Hesperia Settlement
p. Shaman Village Cave to Contigo
q. Jupiter Lighthouse
r. Contigo Revisited to Gondowan Settlement
s. Magma Rock
t. Loho to Prox
u. Mars Lighthouse and Ending
v. Yampi Desert Cave
w. Sea of Time Islet Cave
x. Treasure Isle
y. Anemos Sanctum
4. Boss Guide 1, 2, 3, 4, 5, 6
5. Djinn Guide 1, 2, 3, 4
6. Summons FAQ 1, 2, 3, 4
7. Sound Test Listing
8. Forged Items Guide
9. General Item Guide 1, 2, 3, 4, 5, 6, 7, 8, 9, 10, 11, 12, 13, 14, 15, 16, 17, 18, 19, 20, 21, 22, 23, 24, 25,
10. RNG Guide
11. Legal Information
 Gameboy Advance Game Walkthroughs Gameboy Advance Game Walkthroughs |
|
|
|
|
|
|
GAMEBOY GBA WORLD
Nintendo 3DS GameBoy Games, GBA Cheats, FAQs, Reviews, Walkthroughs |
|
|
|
|
|
Golden Sun: The Lost Age FAQ/Walkthrough.
Written by DarthMarth |
Walkthrough
i. Lemurian Ship to Shrine of the Sea God
LEMURIAN SHIP
Go through Piers' quarters to the actual level. Don't bother going down the stairs here. On the only real path lies an Aqua Jelly. These enemies are not much tougher than normal enemies and shouldn't be too hard, but they inhabit the whole ship. When you defeat one, it turns into a freezeable puddle. Don't freeze the first one; hop over it. Climb down the ladder, then defeat and freeze the next one. Hop across the pillar and grab the Potion, then go down the next stairs. Enter the only accessible door to emerge in a room with a whole lot of Aqua Jellies. You can't fight them yet, so just continue on. Enter the next door now. You'll see 5 reachable Aqua Jellies. Defeat and freeze the bottommost two and move the box in between them. Hop across the pillars and exit the room. Move the box to the left down to make a shortcut, then continue to the next room. Here, you want to try to defeat and freeze every Aqua Jelly. This shouldn't be all that hard. The only tip you should need is to Move the box to the lower left corner of the pushable area to create a chain of pillars. You may also want to check the boxes in the upper left corner for an Antidote (use Reveal to find out which one it is in quickly). Continue on to an old room. You'll spook an Aqua Jelly as you enter. You can't cross the unstable blue bridge here yet. Defeat and freeze the scared Jelly to stabilize the bridge. Enter the door and go through one more hallway to emerge in the room filled with Aqua Jellies. Save your game and Standby 3-4 Djinn of every element, then try to fight the Jelly in the middle.
BOSS BATTLE: AQUA HYDRA
This guy is a joke. Your initial Summon attacks should take off at least 1500 of his 2276 HP. After that, use strong Psynergy and attacks to finish him off. The Aqua Hydra attacks only once per turn, so healing shouldn't be a problem. After you beat the Aqua Hydra, he'll drop a vial and fill the room with water. Don't worry about the treasure chest right now; you'll need the Parch Psynergy to get it. Hop across the raised crates to the next door. Go down the hallway and the ladder to... a cave? Since when to ships have caves in them? Push the hollow pillar on the right onto the teardrop tile and use Douse on it to open the door. Go down the long hallway to the ship's power core. Piers comments on how the monsters got on board (he is sure he locked the ship-maybe they came in liquid form), then sets the Black Orb in the pedestal, starting the ship. Once you're sailing, Piers tells you to take the tier and practice sailing. Jenna says some places she wants to go, and Piers agrees. Kraden tells you that Vale would be impossible to land on because of the rocky cliffs surrounding it. You also can't land at Tolbi, because the people of Gondowan are "looking for you". You decide to just explore the Eastern Sea and gain control of the ship. Get used to the controls and sail your way to the northwestern side of Indra, to a small island with a single house on it. Don't land there, though-land on Gondowan just behind it. Head left to be north of the Kibombo Mountains. You should be able to find your way back to Kibombo from there.
KIBOMBO
Stay at the Inn and talk to the locals again if you want, then go north to the Gabomba Statue, Enter on its tongue.
GABOMBA STATUE
Go through the doorway the Black Orb rolled through. Return to where you got the Black Orb originally. The last time you were there, the statue created a ladder you couldn't do much down yet. Well, now that you have the Cyclone Chip from Madra, you can explore the area under the ladder to get a Djinni and a strange book.
GABOMBA CATACOMBS
There are lots of weeds in this cavern, which can be blown away by Cyclone. Climb down the ladder and walk as close to the large patch of grass left of the ladder you entered by as you can (a rock blocks the way). Use Cyclone and you should be whisked down to the floor below and land right next to a Venus Djinni. Battle Mud to have it join you, then slide down the chute and climb the ladder and stairs to the upper floor. Slide down this chute and go left to the upper left corner of the room and another grass patch. Use Cyclone here to be carried off again. Go left through the hallways and to the next room. Go around the right side of the room, using Cyclone on the grass patch you find to get a Mint. Climb down the ladder and Cyclone the grass a ways down to uncover a puddle. Freeze it, then climb back up and hop across. Use Reveal in the middle of these plants to reveal the next staircase.
You'll emerge in a room with a rushing river. Go left to the river and make your way straight across it. Go up and left to some plants. Use Cyclone while standing on the two you can reach to uncover a puddle on the other side of some rocks. Return to the river crossing and make your way up the river to another shore on the left side. Go down and freeze the puddle you uncovered. Return to where you cast Cyclone and go left to find a ladder. Hop across the ice and take the next stairs. Climb down the nearby ladder and head down the hallway. You can fight a Mad Plant by using Cyclone on the large grass patch (it isn't too hard). Keep going up and climb the ladder to find yet another Gabomba statue. The statue tells you that because you have reached this place first, it will give its magic to you, not Akafubu. It holds up a black book and gives you the conditions for it giving its magic to you. It tells you not to mention that you have passed this test to Akafubu, who should have passed it but was not ready. Now, take the black book, which turns out to be the Tomegathericon. No, that's not a typo, its name is the Tomegathericon. This book of necromancy is your third class changing item. Try it out if you want, then exit Kibombo and return to your ship. Sail around Indra to the beach on Idejema where your adventure began. Get off your ship and revisit Daila. Enter the temple-like Sanctum there. Climb down the ladder in the back and have Piers freeze the two leftmost puddles. Hop across them and get the Sea God's Tear. When you're ready, return to the Shrine of the Sea God.
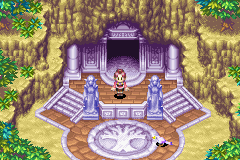
SHRINE OF THE SEA GOD
When you revisit this cave/tower, return to where you found Breath. Go over to the left and have Piers freeze the 3 puddles. Hop across them and head through the door. You'll be outside above the ocean. Hop across the left side of the pillar formation to more land. Push the wood pillar down and hop to the path leading to the stairs. You'll be above a wide river. Head up and climb down the ladder at the upper left corner of the room. Go down and climb the other ladder, hop over the gap and cross the bridge, then step onto the cracked bridge. It breaks and floats down to a rocky area. Get off it and go north, through some rocks and past a rope. Climb the ladder and get the Rusty Staff from the chest. Climb back down and use Lash to get back up to above the river. Go up and past where you got the Rusty Staff. You should soon see another cracked bridge. Step on this one to have it float you down a long ways. Get off, climb the ladder, and go up the stairs. Go right and climb down the ladder. Move the pillar here into the indentation to make a shortcut, then climb back up and go down the stairs. Hop across the rocks and logs here until you reach 6 rocks in the Reveal pattern. Use Reveal while standing on the bottom one to make a seventh one appear. Hop across to a statue like the one in Daila. Use the Sea God's Tear on it to have it float you up to another room. Climb the ladder here to emerge in a manmade section of the Shrine. Hop the gaps and climb the next ladder to be on top of the tower. Climb two more ladders and take the Right Prong from the pedestal. This item is useless now; you'll need to find the two other pieces.
Now, Retreat from the Shrine and return to your ship.
|
|
|
| Golden Sun: The Lost Age |
|

|
|
Play NDS ROM Games, Movies and MP3s on
Nintendo 3DS and DSi with R4i 3DS SDHC
 * 3DS R4i SDHC, SuperCard DStwo 3DS * 3DS R4i SDHC, SuperCard DStwo 3DS
and AceKard 3 3DS - Shipping WorldWide.
Free delivery to UK, Canada, USA, EU
R4 3DS - AceKard 2i 3DS - R4i Card.
|
|
|
|