Walkthrough
f. Garoh revisited to Osenia Caverns
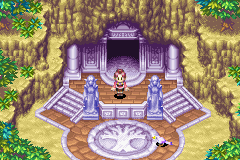
GAROH
Now, return to the northeast corner of the town. You'll see the werewolf pop out of the rock. Use Reveal to find a hidden doorway and repeat his trick. Soon after you enter the cavern, the werewolf child appears briefly. Follow him into the catacombs. Soon, you'll emerge in a room with a strange rock in its center. As your party prepares to search this room to find where the child went, the adult werewolf comes out and speaks! The werewolf introduced himself as Maha. He deduces that you know Whirlwind and learned Reveal at Air's Rock-how did he know? Maha tells you about how werewolves were once slaughtered in "purification" and sends you to the inn to rest. You don't get healed though; that's what you get spending the night for free. Exit the inn (it's morning now!) and return to Maha to finish your conversation with him. Kraden accidentally insults Maha by telling him he thinks it's unusual for werewolves to change their shapes. Maha gives you some examples of how other animals change their shape and insults Kraden about not giving it enough thought. They talk about Adepts and how Felix and Jenna came from the base of Mt. Aleph, which is legendary to Garoh. They discuss how the Psynergy Stone in the heart of Air's Rock is giving the people of Garoh their powers. After some pacing, Maha gives you a Jupiter Djinni (Ether) for your help with his mysteries! Before you leave, try using Reveal and going into the rock Maha came out of for a laugh. Is that really where he lives!? Before you go, explore the catacombs linking Garoh's houses to find a new sword and buy some items from the shops. Now, leave Garoh and go to Yampi Desert (you probably saw it just after Osenia Cliffs).
YAMPI DESERT
All you can do in the first area is Pound down a pillar in the lower right corner to find a chest containing the Guardian Ring. In the next area, you'll encounter a weary band of adventurers trying to get to Alhafra. You can't help them yet. Go on to the next area. You should see a pillar blocking a path through two plateaus here. Pound it down and go through and right. After you pass two Poundable pillars next to each other (don't Pound them), you'll see another blocking pillar. Pound it down and go northwest from it. Pound a pillar at the foot of a cliff to uncover a ladder. Climb it and jump your way to the lower right plateau. Here you'll find a new Jupiter Djinni, Blitz. Beat it to make it join you. Now go back to the ground level, southeast of the Blitz plateau. Slide down the slope and continue to the next area. If your party is running low on PP, take the Psynergy Stone here and then Pound the middle of 3 pillars to uncover a ladder. Climb it and go on to the next area. Here, a shape is moving around under the sand. Pound down the only standing pillar to divert its fixed course. The shape jumps out of the sand, revealing itself to be a giant scorpion, and scuttles on to the next area. Obviously you should follow it. Before you do anything else, set Pound to L or R; you'll need timing for the next two areas. Use Pound on the lone pillar in this area when the scorpion is northeast of the pillar, near the top of the screen (keep in mind the scorpion keeps moving when the first is Pounding the pillar down). This should make it move on to the next area. If not, exit the area and try again. In the next area, Pound the right hand pillar when the scorpion is northwest of it, before he turns south. This should make him go up to a sandy pool. Before following, Standby your Djinn and prepare for a boss battle.0 When you step on it, the scorpion pops out and uses a new Psynergy, Scoop, to make you both drop down to an underground cavern.
BOSS BATTLE: KING SCORPION
The KS is the first of a long line of "joke bosses". Although he has over 1000 HP, the King Scorpion's attacks are ridiculously weak, doing only about 10 damage per hit. Just Summon your strongest creatures and then attack him with Psynergy, healing when necessary. Once you beat him, pick up the stone he drops. It's the Scoop Gem! Try it out on the sandy spot you landed on to uncover a geyser that takes you back to the surface. Return to where the stranded adventurers are and go south. You should soon see another sandy patch that you can Scoop. When you Scoop it, you'll uncover an underground cavern. Follow it to emerge east of the travelers, near an oasis. Climb up and down the ladder until the travelers notice you and follow your tracks to the hole. Go up from here to the next area. Scoop the lower right patch of sand in the middle of rock to find 315 coins, then go through the doorway to another cave. This cave is filled with sandy rivers flowing around. It should not be too hard to get the Hard Nut and Blow Mace (you need to use Pound from a square away from the pillar, not right next to it) in here. Once you're ready, go down the ladder and out of the cave. You will now be in an outdoor area filled with sand waterfalls. Let the first one carry you to the ground and use reveal on the 3 by 3 patch of rocks. They form an arrow pointing to a cave you cannot reach until the end of the game. Keep going on through the valleys to reach another square. Reveal this one to find a chest with a Lucky Medal. Climb up the ladder beyond this and make your way past two sand waterfalls. Keep going on the pink cliff to a rope. Lash it to the other post and climb up it. Fall down the right side of the nearby sand waterfall to land on a rock. Get off the waterfall on the right side and take the class-changing Trainer's Whip from the chest. Return to the ladder near the Lucky Medal chest, go past the two waterfalls, and climb the ladder. Go to the right side of the first waterfall you crossed, go over the first fall on it, and get off the right side. Now simply walk to the northeast and exit the desert. Alhafra is visible from the exit of the desert.
ALHAFRA
As you go north to the statue in this large town, you'll see the band of travelers you met in the Desert reaching their destination. They soon walk off to see the mayor of Alhafra and talk about the menace of Briggs. As they walk off, you'll notice a suspicious character lurking behind some trees. If you talk to him, his suspicious behavior and running off make it obvious he's one of Briggs' lackeys! Go north and buy the latest gear, then go down the stairs to the east and head over to the shipyard.
EASTERN ALHAFRA
As you get on board Alhafra's only ship, it's obvious that the tidal wave severely damaged it. Some more of Briggs' lackeys are here, observing the damage. You can't do anything here yet, so go down below decks. As you walk down a long hallway, standby all your Djinn. Soon, you'll see a sea fighter talking with Briggs himself! The sea fighter and Briggs are discussing the mayor of Madra's arrival and how Briggs and his crew aren't really pirates, just people trying to save their hometown of Champa from starvation. They also talk about how they steal from only the non-risky towns that are not on alert for their arrival, to ensure their success and prevent people from coming after them. After the sea fighter makes a comment about Briggs "having brains coming out of his ears", Jenna gives you away by saying that there's nothing smart about that. Sheba and Jenna try to tell Briggs to come with them and tell the mayors that Piers is innocent, but you instead get into a fight.
BOSS BATTLE: BRIGGS AND SEA FIGHTERS
Once again, you'll be battling up to 3 enemies. Concentrate all your Summons, Psynergy, and attacks on Briggs. If you try felling Sea Fighters, Briggs will just whistle for more. Just keep your party well healed and concentrate on Briggs. After Briggs is gone, the remaining Sea Fighters will be easy. After you defeat Briggs, he'll drop a Vial. Briggs, always the gentleman, asks you to turn him in. Jenna says that he first has to say that Piers is innocent, and Briggs mainly agrees. Soon, a strange woman comes and asks you to forgive Briggs and his men. She says that she is Chaucha, Briggs' wife. Briggs tells you to leave his wife out of this (she is no pirate) and Chaucha once again says that Briggs is stealing to help Champa. Lately, the sea that the Champa had depending on started warming up, causing the fish to disappear. Their soil is also barren, preventing crops from growing. Sad... After everyone laments the Champa's plight, Kraden tells you that it is very far away, on the other side of the eastern sea. Briggs explains that they had to steal from far away towns, or else it would be obvious who the pirates were. Then no one would forgive Briggs, not even his... grandmother!? How old is she?? Then, the two mayors and their entourage appear at the stairs. The mayor of Alhafra is shocked that Briggs and his men really are pirates, and the mayor of Madra is insulted that the other mayor would not take his word. After some talking and reminiscing, everyone introduces themselves. After Briggs talks with the mayor about who owns the ship you're on (apparently Briggs bought is with money he stole), Briggs agrees to go to jail. He asks Chaucha to take care of Eoleo (he has a son, too?) and leaves. Another Madran leaves to go and free Piers. Before the mayors leave, the mayor of Alhafra invites Kraden and you to his mansion. Before you leave the boat, go down to where Chaucha came from. Move the box out of the way and enter the door. Before you leave the boat, go down to where Chaucha came from. Move the box out of the way and enter the door. You'll see some bread lying on a box. Have Felix use Tremor to knock it down and take it. Now go back above deck. Now that the Sea Fighters are gone, you can fix the boat. Here is a list of things you should do to fix it:
Move the rock just below the horizontal log one space down, then push it the rest of the way into the water.
Push the log in after the rock.
Walk down the mast and push the rock here into the water.
Move the large box on the sail down into the water.
Walk to the upper right tip of the mast pole and walk up the rope. On the bow of the ship, Lash the rope and shimmy up. Climb down the two vines and Pound the pillar into the water.
Use Move to move the box in the lower right corner of the area to the left, from below.
Go over to the left and get onto the log you pushed. Climb the rope and go all the way around back to the upper side of the box you Moved. Move it the rest of the way into the water.
Now, return to Alhafra. Give the kid at the foot of the stairs leading to the harbor the bread you found on the ship and he'll have his dad give you permission to enter the caves under the mayor's mansion. The mansion is north of the town; the cave is west of that. Once you enter the cave, go down the stairs and go roughly south from there. You only need Pound and Lash to get the 123 coins, Ixion Mail, and Lucky Medal. Before you leave Alhafra, visit the mayor. Now, return to Mikasalla (there is a shortcut leading to near Air's Rock if you go south from where you left the Yampi Desert for Alhafra).
MIKASALLA
Go to the lower left corner of the town, to the sheep and chicken. Read the chicken's mind to find that you need to dig here. Use Scoop on the upper left part of the sandy patch (keep trying until you find the spot) to uncover a ladder. Follow the cave and go north from its exit to find a Mars Djinni, Spark. You don't even have to battle it! Now, return to the cave you saw northeast of the patch of grass you found Sour in.
OSENIA CAVERN
You can use Scoop on the X here and follow the cave to get a new Summon, Megaera! Now, go back across Osenia Cliffs. On the southwestern side of Indra, you'll find the Gondowan Cliffs.